Monday, August 31, 2015

The Big Reveal: My Blue Velvet Triumph

You're at a flea market or thrift store. You see an adorable piece of furniture with the ugliest fabric and/or paint color. So your options are to take it home for $35, hopefully only have to put under $100 into fixing it up OR you can buy something new.

An alternative scenario is that you wish you were the bargain fixer-upper, but you just can't visualize the potential in something old. Some people are just born with this ability but don't worry, anyone can follow some simple tips to engage this part of their brain.

There are the easy DIY's that involve a fresh coat of paint or a knob replacement. Simple frames, for example, cost me a total of $10. $2 for the four frames, $4 each for the two spray paint cans - easy.

Then there are difficult tasks, like the one I am revealing. I do have some sewing skills and I think that definitely helped with figuring out how to approach this couch even without a sewing machine. I used a staple gun for everything!


It is just a part of my artist brain that when I come across some things, I can't help but see the potential in them. Some times I forget the work that has to be put into it and it takes forever like the lovely couch below. 


I bought this couch in March expecting it to be done some time this summer. I just finished it yesterday August 30th! It only took me a total of 3 hours to do (which I probably should have taken more time but I didn't have any more time - I just wanted it to be done!) but accumulating the fabric and tools and paint to get it done took much more time. Above, is the couch shown how it lives in my space, the other photographs do not properly represent that unless otherwise noted.

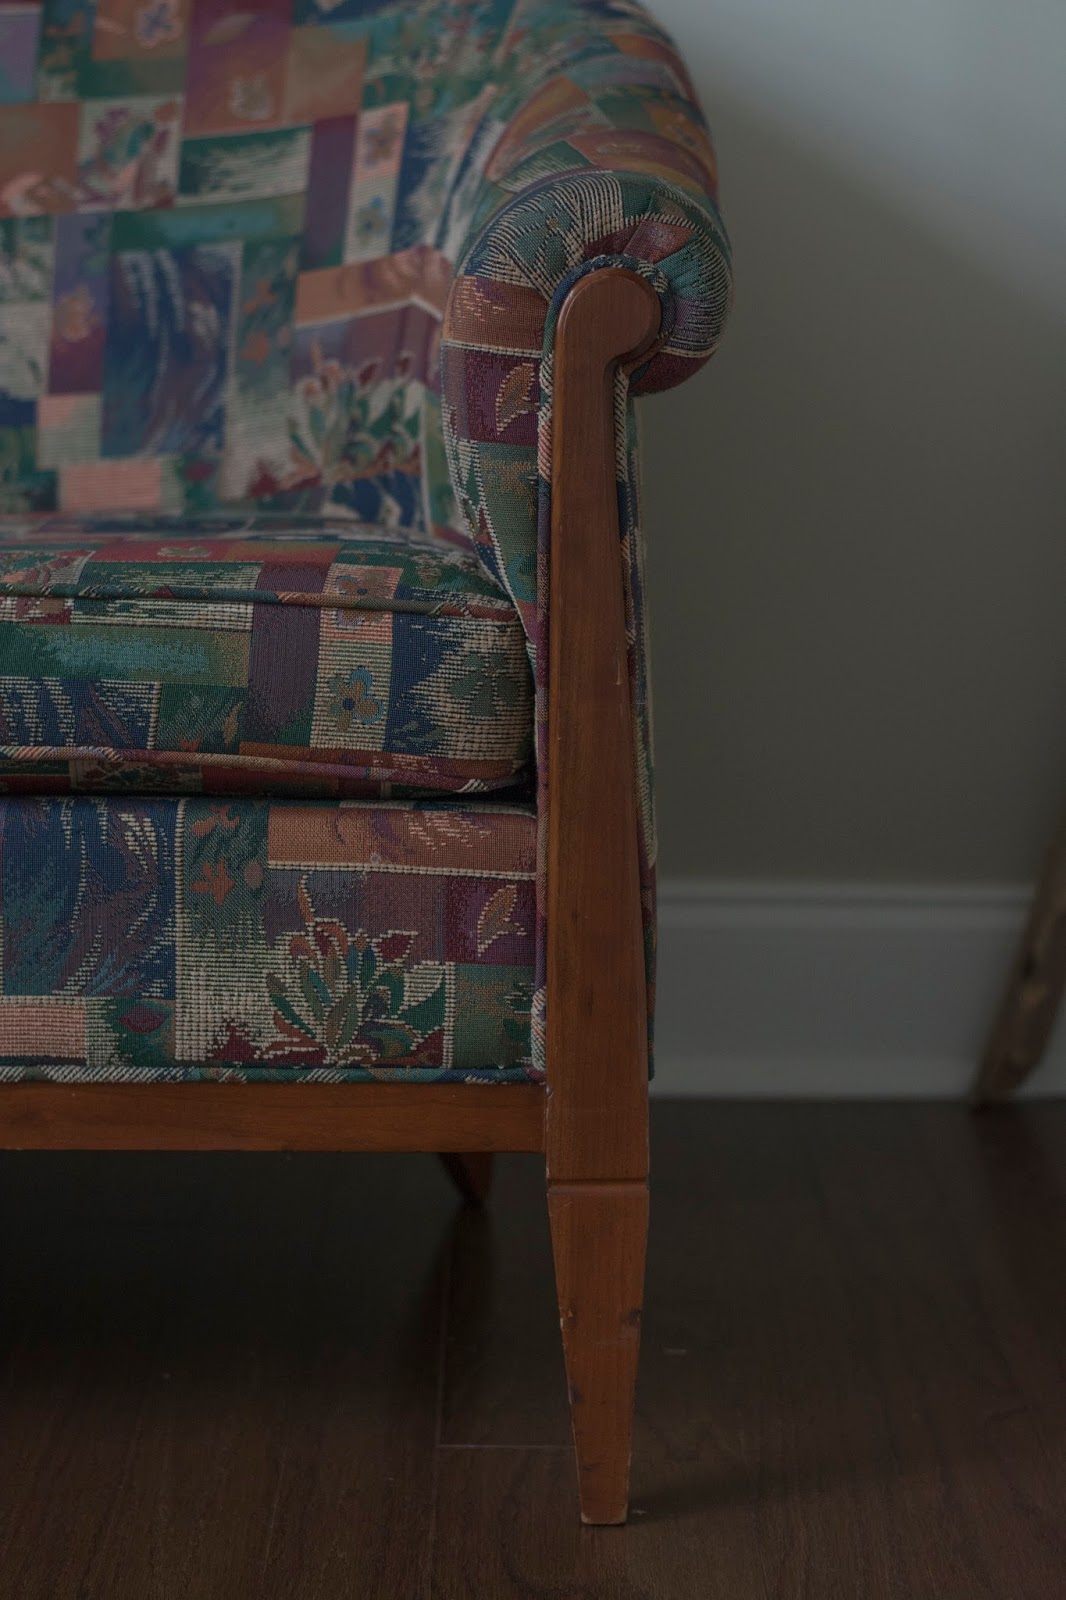
This couch is absolutely not perfect. It has maybe too much "character" but my apartment kind of needed something strange to put in the center of its very stark black and white space. So below is the beauty before I changed anything. I knew that I wanted to have a pop of color in my space. Velvet is a trend that made its way back into everyone's interior decorating and I have always loved it! But before all that I fell in love with the shape of this settee. Bucket shape has always been a love of mine - more so with chairs than love seats but it definitely won my heart in this case. The legs were also something that attracted me, 60s retro is very much back in decorating style.


So ugly, I know! That pattern actually lived in my apartment all summer - I can hardly believe it myself! Hopefully you guys can see why I thought it had potential though. It was only $65!


After choosing my fabric, I thought I wanted silver metallic paint. So I went on Lowes and ordered what I thought was metallic silver, but it wasn't! I actually ordered a silver 'satin' paint (linked below). But I opened the jar and actually liked it more so I just went with it! Initially I painted ALL of the woodwork expecting to have it all showing but those arms were way too hard to cover with my only tool being a staple gun, so I ended up wrapping the fabric around the arm.


My goal for this couch was achieved - I covered this couch in 3 total pieces. I did not photograph the steps because I am obviously inconsiderate to anyone that actually reads this blog but if someone really wants to reupholster their couch in this train wreck way, I'd be happy to make a video demo or something. I'm sure any sane person would just go pay someone else to do it but not this gal! Depicted below is how I approached the task. One piece for the bottom in blue, one for the seat - purple, and one piece to start at the back and come around to the front and under the seat - yellow.


So then I just went at it! Starting from the little strip in front and then I went around back and worked my way over. The hardest part were the arms and deciding how I wanted to do them. I made it up as I went along really. But I am so happy with the results.


Like I said, it's not perfect whatsoever but I love it because I did it all by myself! That really is the most rewarding part. (Above does show how it looks in the space).

I hope this post doesn't make you crazy! I know it is very scatter-brained but it's because I am too! I actually cannot get the song 'Blue Velvet' out of my head for the past two weeks. I hope this finds you inspired to get the bargain beauty piece in your space that you always wanted. I also hope that this helps your life stay simple and easy (and not crazy).

Best,

Michelle

Paint
Fabric

Friday, August 21, 2015

The Look for Less

First of all, I would like to apologize for taking so much time off but I have been very busy "behind the scenes", getting ready for a very big reveal that is taking FOREVER. No worries though, it shall be ready within the next couple of weeks so stay tuned! I have also been working on a big photo project that has consumed much of my time. But enough excuses, here is the latest addition to the apartment.

I made this beautiful and one of a kind, wall weave. I actually have no idea what to call this, but all the kids are making them these days. The most important thing is that I had a lot of fun making it and it only took me about 5 episodes of Grace and Frankie to make it!


The supplies consisted of drift wood that I found and two types of yarn (you can use more if you like). Always buy more than you anticipate using. I bought two cream and one grey yarn. If you would want yours bigger than mine, definitely buy three bundles of whatever your base color is - I only have a small bundle left. Here is what it looks like in the space.


I personally wanted mine to be a loose weave. I have seen others that are super tight but I wanted mine to look kind of old and raggedy. I just did a simple criss cross pattern and threw in grey at random. I do apologize for not including a how-to but I can try to explain: I took every other strand and separated them so that it doubled in length. I then laid one strand across all of them. Then I just criss crossed each opposing strand (I'm sorry, this probably makes no sense!). Here are some close ups.


The knots were super easy... they're just knots! 


I hope this doesn't frustrate you and I hope it helps your life stay simple and easy - as always!

Best,

Michelle

Wednesday, August 5, 2015

Becoming a Morning Person

Becoming a morning person is not easy. I used to be such a night owl and thought that mornings were evil sun-filled sleep deprivers, but my outlook has changed. I realized that being a morning person means getting so much more done! You have so many more hours of day light! And maybe, you get all of your blogging done at 3am, but I have a naturally lazy side - I like using natural light in my blog photos to avoid setting up lights and that is only achieved in day light. Believe me there are ways to change yourself and in my opinion, becoming a morning person has to start with the space you are in.

For starters, my bed is the absolute coziest and it is really so hard to leave it. Start by setting your alarm to a really good-feel song… across the room. For some, getting up to shut off your alarm is the only way to get out of bed.

Now the next thing you have to change is your attitude. I know you're cranky, I usually am too but try to think of all of the things you can get done with this extra time! Positivity is a really good key… also, prepping the night before. If you have a list of things to do the next morning i.e.:

  • Fix coffee/breakfast
  • Take blog photos
  • Finish blog post 
  • Do some yoga
  • Read a chapter of book or a couple poems
  • Water plants
  • Clean bathroom
etc etc., the list can go on and on even if they are little things! Prepping the night before definitely goes further than your list though. Have your coffee ready to be made! It makes moving around easier when there is less to do. Most importantly though, make your living space just as inviting as your bed. I set up a little area so that I can do three vinyasa to start my day breathing and getting my blood pumping - I automatically feel more awake. Then I light a candle, drink my coffee and read a poem or two.


You can put a blanket down, some pillows, and your yoga mat, and this will help you feel like mornings can be comfortable and easy. I also like to make my desk inviting so that when I'm done reading, I can move over easily to my desk and pay bills or blog or whatever. My desk will have more candles and the rest of my coffee waiting.


Aroma therapy is a great way to wake up as well. Breathing deeply and inhaling relaxing scents will help you stay relaxed, avoid a stressful morning, and of course make sitting/working at 8am more enjoyable. Keep in mind that being a "morning person" does not mean you have to start cutting out sleep. The earlier you start waking up, the more you will get tired in the evening, so now you have to choose which you prefer! Do you want to be a morning person? And the answer can certainly be no! Maybe this can help you getting up at 1 in the afternoon too!

Whatever you choose, I hope this helps your life stay simple and easy!

Best,

Michelle

Book: Robert Browning's Poems